

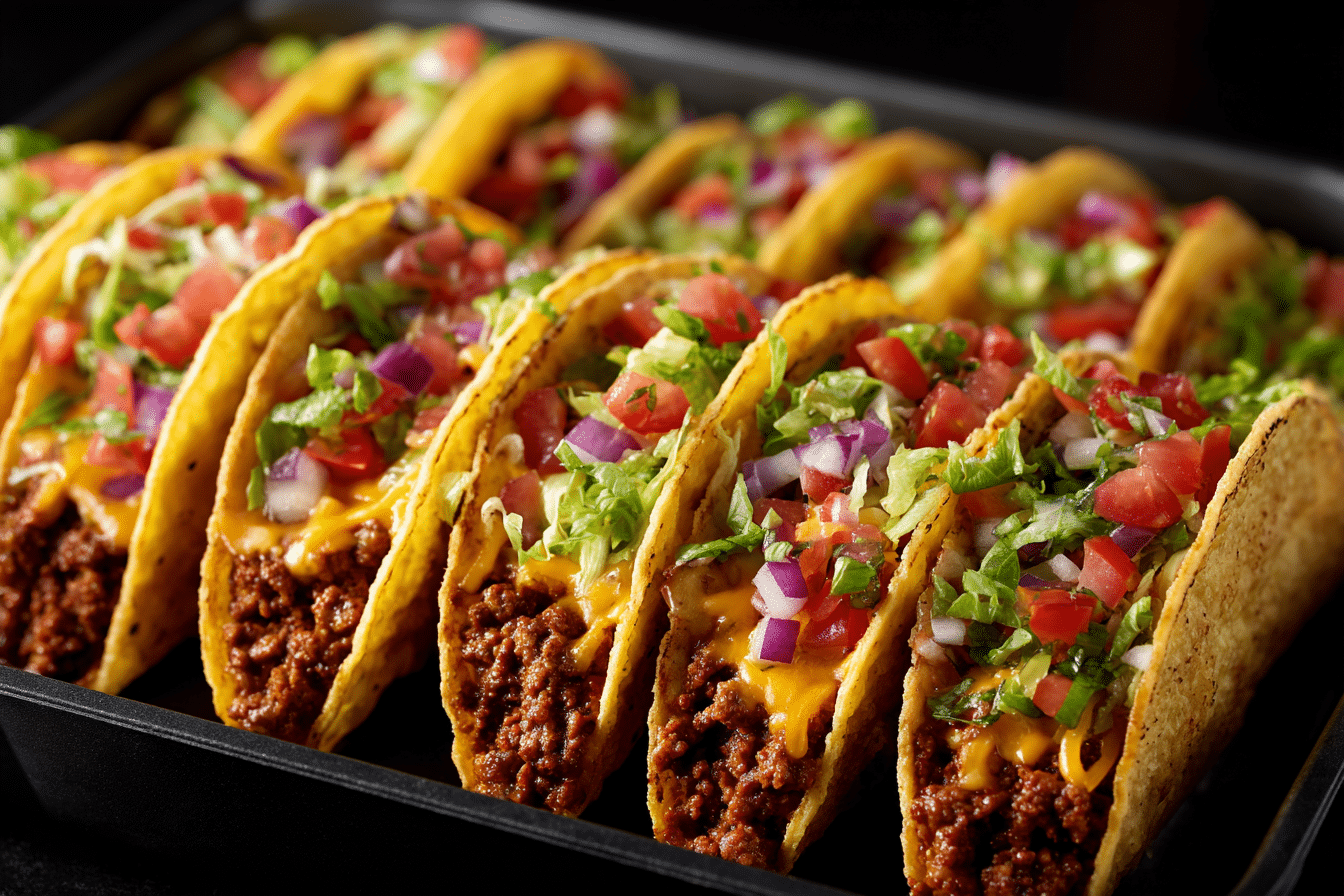
Oven-baked cheesy tacos are the ultimate answer to taco night made easier — a comforting, hands-off twist on the classic. These tacos are assembled, filled, and baked all in one go, making them perfect for busy weeknights, feeding a crowd, or getting that irresistible melted cheese finish without multiple pans or stovetop mess.
Instead of cooking and filling tacos one by one, this method lets you prep a tray of crunchy, beefy, cheesy tacos that are ready all at once. The shells crisp up in the oven, the cheese melts into the seasoned meat, and the result is a golden, savory taco with layers of gooey goodness and plenty of flavor in every bite.
Whether you’re feeding picky eaters or meal prepping for the week, oven-baked cheesy tacos are a guaranteed hit. Customizable, quick, and delicious — this is one recipe you’ll come back to again and again.
Ingredients Overview
These oven-baked tacos come together with simple ingredients that pack bold flavor. Let’s break down what you’ll need and how each component contributes.
Ground Beef (or Turkey)
The base of the filling, ground beef brings hearty texture and deep flavor. Choose 85/15 or 90/10 ground beef for a good balance of flavor without excess grease. You can also use:
-
Ground turkey for a lighter version
-
Ground chicken for a leaner protein
-
Plant-based crumbles for a vegetarian option
Cooked until browned and crumbled, this becomes the juicy center of the taco.
Taco Seasoning
A key flavor booster. Use store-bought taco seasoning or make your own with:
-
Chili powder
-
Ground cumin
-
Paprika
-
Garlic powder
-
Onion powder
-
Oregano
-
Salt & pepper
Add a splash of water to help the seasoning coat the meat evenly and create a saucy texture.
Shredded Cheese
Cheese is what makes these tacos shine in the oven. Look for blends that melt well:
-
Cheddar
-
Mexican blend
-
Monterey Jack
-
Colby Jack
Using freshly shredded cheese ensures better melt and stretch. Layer it under and over the meat for extra gooeyness.
Taco Shells
Use stand-and-stuff hard taco shells — their shape holds filling well and crisps up nicely in the oven. Regular taco shells work, but may fall over during baking.
Warm the shells slightly before filling to prevent cracking.
Refried Beans or Black Beans (Optional)
Spreading a thin layer of refried beans inside each shell helps seal in moisture and adds a creamy contrast to the crispy shell. You can also use:
-
Whole black beans
-
Pinto beans
-
Seasoned mashed sweet potatoes for a vegetarian twist
Toppings (for after baking)
These go on after baking, to keep them fresh and crunchy:
-
Shredded lettuce
-
Diced tomato
-
Avocado or guacamole
-
Sour cream or Greek yogurt
-
Jalapeños or hot sauce
-
Cilantro or green onions
Step-by-Step Instructions
Here’s how to make crispy, cheesy tacos straight from the oven — no stovetop juggling required.
1. Cook the Meat
In a large skillet over medium heat, cook:
-
1 lb ground beef (or alternative)
-
Break it up with a spoon and cook until browned (about 6–8 minutes).
Drain excess grease, then stir in:
-
1 packet taco seasoning (or 2–3 tbsp homemade)
-
⅓ cup water
Simmer until thickened, about 2–3 more minutes.
2. Prep the Taco Shells
Preheat oven to 375°F (190°C).
Place 8–10 taco shells in a 9×13-inch baking dish or sheet pan. If using stand-and-stuff shells, they should sit upright easily. Warm them in the oven for 3–5 minutes while the meat finishes cooking.
Optional: Spread a thin layer of refried beans in the base of each shell.
3. Fill and Layer
Fill each shell with:
-
2 tbsp cooked taco meat
-
A sprinkle of shredded cheese
-
Repeat layering for extra gooey tacos (if desired)
Top all the tacos with an extra layer of cheese before baking.
4. Bake
Bake uncovered at 375°F for 10–12 minutes, or until:
-
Cheese is melted and bubbly
-
Shells are crisp and golden at the edges
Don’t overbake — the shells can get too hard.
5. Add Fresh Toppings & Serve
Let the tacos cool for 2 minutes, then top with your favorites:
-
Shredded lettuce
-
Tomato
-
Sour cream
-
Salsa or hot sauce
-
Avocado slices
Serve immediately for the best crunch and flavor.
Tips, Variations & Substitutions
Cooking Tips
-
Stand-and-stuff shells make baking much easier.
-
Don’t overfill — too much moisture leads to soggy bottoms.
-
Layering meat and cheese inside creates the perfect gooey middle.
Flavor Variations
-
Tex-Mex Style: Add corn, black beans, or diced green chiles to the meat.
-
Buffalo Chicken: Use shredded rotisserie chicken, buffalo sauce, and blue cheese crumbles.
-
Taco Pizza Style: Add sliced olives, onions, and chopped jalapeños before baking.
Substitutions
-
Cheese-free: Skip the cheese and add guacamole or avocado after baking.
-
Low-carb: Use low-carb tortillas in muffin tins instead of hard shells.
-
Vegan: Use plant-based crumbles and dairy-free cheese shreds.
Serving Ideas & Occasions
These baked tacos are made for casual fun — ideal for:
-
Taco Tuesday family nights
-
Game day spreads
-
Kid-friendly dinners
-
Potluck parties (make a double batch!)
Serve them with:
-
Spanish rice or cilantro-lime rice
-
Chips and salsa or queso
-
A crunchy cabbage slaw
-
Cold drinks like sparkling water or horchata
They’re great for feeding a crowd or batch-cooking for a week of easy lunches.
Nutritional & Health Notes
Oven-baked cheesy tacos are hearty, filling, and full of customizable nutrition. One taco (with beef and cheese) provides:
-
~200–250 calories
-
10–15g protein
-
Moderate carbs and fat
Healthier adjustments:
-
Use lean ground turkey or chicken
-
Add beans or veggies to the filling
-
Serve with light toppings like Greek yogurt and shredded lettuce
To make it gluten-free, choose certified gluten-free shells and seasonings.
FAQs
Q1: Can I use flour tortillas instead of hard shells?
A1: Yes, but they won’t crisp up the same. To make crispy taco cups with flour tortillas, press them into muffin tins and bake before filling.
Q2: Can I make these ahead of time?
A2: These are best fresh from the oven, but you can prep the meat and fillings in advance. Assemble and bake just before serving to maintain crunch.
Q3: How do I prevent the shells from getting soggy?
A3: Pre-baking the shells for 5 minutes helps. Also, avoid watery fillings — drain any excess liquid from the meat and don’t overload with wet ingredients.
Q4: Can I freeze baked tacos?
A4: It’s not recommended. The shells lose their crispness when thawed. Instead, freeze just the cooked taco meat and assemble fresh.
Q5: What’s the best cheese for these tacos?
A5: Cheddar, Monterey Jack, or a Mexican blend melt well and bring bold flavor. Freshly shredded cheese melts better than pre-shredded.
Q6: Can I make these vegetarian?
A6: Yes! Use refried beans, black beans, lentils, or plant-based meat alternatives. Add veggies like corn or bell pepper for more texture.
Q7: Are oven-baked tacos healthier than fried?
A7: Definitely. Baking cuts out excess oil, making these a lighter option without sacrificing flavor. You also control the ingredients and sodium levels more easily.
PrintOven-Baked Cheesy Tacos – Easy, Crunchy & Family-Friendly
Crunchy, cheesy, and baked all in one pan, these oven-baked tacos are perfect for quick dinners or parties. Filled with seasoned beef, melty cheese, and your favorite toppings.
Ingredients
-
1 lb ground beef or turkey
-
1 packet taco seasoning (or 2–3 tbsp homemade)
-
⅓ cup water
-
8–10 hard taco shells (stand-and-stuff recommended)
-
1½ cups shredded cheddar or Mexican cheese blend
-
½ cup refried beans (optional)
-
Toppings: lettuce, tomato, sour cream, avocado, salsa
Instructions
-
Preheat oven to 375°F (190°C).
-
Cook ground meat in a skillet until browned. Drain fat, add seasoning and water, and simmer until thickened.
-
Warm taco shells in the oven for 3–5 minutes.
-
Spread refried beans (if using) in the bottom of each shell.
-
Fill each shell with meat, then top with cheese.
-
Bake uncovered for 10–12 minutes, until cheese is melted and shells are crispy.
-
Add toppings and serve immediately.
Notes
-
Add black beans or corn for texture and fiber.
-
Use muffin tins to make mini taco cups with tortillas.
-
Great for batch cooking and party platters.